Sunday, 27 July 2008

Painting the Flames of War M10 3" GMC Tank Destroyer

Having assembled the model itself you will need to wash it to remove release agents and dust. This is best done with warm soapy water and a large bristle brush. This way you can be sure that you have removed all the release agent and build up of residue and dust.

Once that is done you will need to leave the model to air dry. Resist the temptation to dry the model off with a cloth or tissue. This will only leave dust and material on the model that you will only see once you have painted the model and will spoil all the hard work. Now that the model is dry its time to undercoat. I always use black for AFVs that are dark green or grey. German tanks with a yellow or ochre base colour I tend to undercoat in white so as not to "kill" the colour.

The Flames of War M10 3" GMC Tank Destroyer Platoon preped and ready.

Now the real fun can begin and its time to break out the airbrush and paints. I use the Vallejo Model Air range as these are pre mixed and can be used in the airbrush straight from the bottle. The range of colours is excellent and the paint gives good coverage with a smooth realistic finish.


Airbrushing the M10 Tank Destroyer.

In the case of the M10 I used Olive Drab as the base colour followed by various yellows and browns to weather the paintwork. Once this has been done and left to dry I apply a filter of burnt sienna and lamp black oil paint heavily diluted with turps just to tone everything down. At this stage I apply the decals before any other weathering.

Firstly gave the model a light spray of matt varnish this protects the work already done and reduces "silvering" of the decals backing film. Decals should be applied to a model with something like Micro Set, this assures excellent adhesion and less "silvering". For heavily detailed areas and difficult shapes I use Micro Sol, this literally melts the decal down onto the model and allows the transfer to conform to the model, check out the Allied stars on the Cromwells and you will see what I mean. Terrific stuff.


The M10 undergoing final weathering.
(The Panthers in the background will be covered in a later post)


Now its time to weather up the model this is done with a variety of MIG powders and artist pencils. Remember weathering should enhance the model and the work already done, it is not an excuse to cover a sloppy paint job.


The Flames of War M10 3" Tank Destroyer. Painted and ready for play.

You can check out further pics of this model in the July gallery by clicking the link below.

Tuesday, 22 July 2008

Flames of War July Gallery

M10 3" Tank Destroyer Right Side
*click here to see how this was created
http://thegeneralspaintbrush.blogspot.com/2008/07/m10-gmc-tank-destroyer-platoon.html


M10 3" Tank Destroyer Left Side

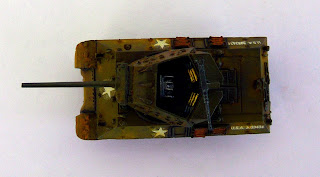
Flames Of War M10 Top View


M10 3" Tank Destroyer rear View

M10 3" Tank Destroyer Front View


Flames of War British Late War Tank Platoon
Sold


Flames of War 7th Armoured Division Cromwell IVs
"The boys are back in Town"
Sold

Flames of War 7th Armoured Division Cromwell IVs
Rear View
Sold


Sherman Firefly VC
Right Side
Sold

Sherman Firefly VC Full On!
Sold


Flames of War Late War British Infantry


Flames of War British Late War Objective marker


Flames of War Late War British Infantry


Saturday, 19 July 2008

Painted Flames of War (FOW) 7th Armoured Division Platoon Now Available

The first Flames Of War (FOW) set painted by myself is now available as an Ebay auction with no reserve. Item number190240128378


Consisting of a full British armoured platoon of the 7th Armoured Division (The Desert Rats), three Cromwells and a Sherman Firefly. They have been airbrushed, weathered, and hand finished to the highest standard. The painted detail on the crew is as always excellent. Please email me for payment details, cheque, postal orders or PayPal accepted, and always remember I am available for commission work should you require something in particular.

Three Cromwells Front View

Cromwells Rear View

Cromwell Side


Sherman Firefly side views (note camoflage detail to main gun as per Flames of War box Art)
FireFly Front View

Flames of War M10 GMC Tank-Destroyer Platoon Construction and Review


The new M10 GMC Tank-Destroyer Platoon set from Battlefronts Flames Of War range, contains two M10 3" GMC tank destroyers, an M20 Utility vehicle and two Jeeps as well as two sets of infantry & command and assorted crew figures. The set comes neatly packaged, in the now familiar olive drab box, illustrated with actual photographs of the completed models just whet the appetite. Upon opening the packaging you will not be disappointed with the contents. Well secured in the clamshell packaging with foam separating the components as is the norm for Flames Of War sets. The white metal parts are held separately from the plastic and resin pieces. All the parts are up to the usual high standard that we have come to expect from Battlefront.


The parts display excellent detail regardless of what type of media they are moulded in. Remember these are effectively multi media kits and will require a certain level of skill, materials, equipment and time to finish properly


As always it is recommended that you check the contents (as with any model kit). Once this is done and you are satisfied that everthing is correct it is time to start.

The first thing I do with any Flames of War Model tank is remove the excess resin from the moulding lug. This varies from model to model and will require either a heavy file or relaltively course wet and dry paper (used wet) to remove.


The M10 tank destroyer set comes with battlefronts new plastic style tracks , main gun and MG. The detail on these is excellent, especially on the .50cal M2HB MG, and the representation of the vertical volute spring suspension system is more than adequate in a model of this size. I always use side clippers to remove the parts as some are rather small and can prove delicate during removal from the sprue. The plastic parts themselves have very little flash and require very little cleaning prior to assembly.


I always use a high grade cyanoacrylate for assembly and find that as long as the mating surfaces of parts are scored in a cross hatch manner to give a key that FOW models require little, if any further pinning, than is moulded into the part.

The M10 models are very straightforward and, if the parts are prepared correctly, assemble into lovely little models in a matter of minutes. In my next M10 post I will deal with the painting and airbrushing of these particular gems from the Flames of War range.

Click here for the painting of this model