Monday, 8 December 2008

Valiant 1/72 scale American GI boxed set for Days of Wonder's "Memoir'44"


For a long time I have been keen on the “Memoir’44” game from Days of Wonder based on the Command and Colours system by Richard Borg as first seen in Avalon Hills “Battle Cry”.Large mounted Maps and variable terrain allow you to recreate major battles of WWII in spectacular fashion with model soldiers, tanks and guns to represent the units under your command. The game models while attractive come moulded in a polythene plastic not really suitable for painting, as the paint will chip and flake, due to the flexible nature of the polythene.

This is where the excellent and affordable “hard Plastic” figures from Valiant come in. At approximately 9 GBP per box for around 65 model soldiers in 1/72 scale these are ideal replacements for the Days of Wonder miniatures supplied in the boxed game. Offering greater detail and a variety of poses, these, once painted enhance the overall visual gaming experience.


The equipment needed is pretty basic, a set of side clippers, modelling knife, file, glue, a set of paints and inks, a drill bit, and size 2 and 0 brushes.


As with all model kits you will need to clip the pieces from the sprue and clean any mould lines and spurs before assembling with polystyrene cement to complete the figure. Once you are satisfied with the overall appearance a quick dip in some warm soapy water to remove any residual release agents and its time to under coat. Games Workshops excellent Chaos Black spray undercoat is employed for this and once dry its time to paint.

The US paint set from Battlefront provides all the basic colours for the uniform and saves any messing about trying to get the correct shade. Having standard colours will speed up the painting process greatly and provide a nice uniform appearance across the models.

Starting with the trousers simply block in “Field Drab”, and as these are very quick drying and I normally paint in batches of 8 or so figures by the time the last model has his trousers on so to speak the first will be dry enough to allow you to continue.


It is best that you create your own routine, i.e. trousers, jacket, helmet, boots, webbing, face, hands, and weapon. This assures that you get a good rhythm going which will speed up the overall process considerably.

All the colours are simply blocked in, except for the face, it is extremely important that the colours are applied in a neat and even manner.

1. Field Drab trousers and shirt.

2. Khaki jacket

3. Brown Violet helmet

4. Red Leather boots

5. Green Grey webbing and gaiters

I paint the weapon with a mix of Games Workshop Snakebite Leather and Battlefronts Red Leather and the mix also goes on the hands and face. Note I do not paint the metallic at this stage as these are always done last so to ensure that there is no contamination of the base colours. There is nothing worse than individual metallic flakes sparkling from Brown Violet or British Khaki !

The face is painted in the traditional manner flesh over brown leaving just enough of the base coat to shadow the eyes nose and mouth.

You now need to set the figure aside for about half an hour to allow the paint to dry thoroughly before applying the wash. Games workshops new washes are an amazing product, allowing you to apply different coloured shading to each area in a controlled manner while working in a similar fashion to the ubiquitous dip method that is proving so popular these days. I use Gryphonne Sienna for the trousers and skin, Ogryn Flesh for boots and weapon,and a 60/40mix of Sienna and Thraka Green for the khaki and Green Grey. Once dry this process will leave you with a very tidy and tonally shaded model. Many people are happy to leave the figure at this stage, as it is reasonably effective. However with a little high lighting you can really breathe life into the figure and turn it from an adequate gaming piece to a little miniature work of art.


As the wash has done the shading for you it is a very simple task to pick out the highlights. Starting with the base colour simply pick out the folds and areas you want to highlight. Then adding white to the colour build up the highlight gradually until you are happy with the effect.


This is an effective method that with some practice should be within the capabilities of most modellers. However if you neither have the time, patience, skill or whatever, I can supply figures painted to exactly the same standard illustrated in this article for only £3.00 per figure. This includes the cost of the figure .


Monday, 6 October 2008

Tigers Marsch! Part II

The nice thing about the Infinity airbrush from Harder and Steenbeck is that while it is a double action in the truest sense it is possible to adjust the amount of paint dispensed by adjusting the simple but effective needle adjustment lock. This ensures a very controlled flow and reduces the possibility of spoiling the work through inadvertently pulling back to hard on the trigger.

Using the supplied Tiger tank artwork as reference I applied the brown camo first and once dry the green. Care really needs to be taken at this stage get it wrong and it will simply be a case of break out the model stripper and start again. Initially the colours will look a little light in tone but this is done to allow for the filters which once applied these will darken the finish and enhance the detail to create a realistic looking model.

Flames of War Tiger 1E´s, from the "Tigers Marsch" boxed set, painted and filtered ready for detailing

Once the filters have been applied and allowed to dry thoroughly it is time to then paint the tracks and add the detail to the models, cables, tools and boxes etc. This was again done with my own blend of colour to ensure that the models comply as closely as possible with the supplied artwork. The filters have done an excellent job of weathering the Tigers and I intend to apply a minimal amount of powders etc as I do not want to overdo the wear and tear to these behemoths of the battlefield.

Next up will be the crew figures. The crew models, for me, are what make Battlefronts Flames of War models special and add that little extra character that makes these models so collectable. Spending that little bit of extra time on the uniforms and facial detail will be well rewarded and I will cover this in my next Blog entry.


Tuesday, 30 September 2008

Tigers Marsch!

the+generals+paintbrush+painting+service+15mm+kubelwagen+25mm+painting service+wargamer+collector+flames of war

I recently received a painting and modelling service commission for a set of models that I have wanted to do since their release earlier this year. The Tigers Marsch set replicating Wittmann and his platoon of Tigers in Normandy
is one that I have wanted an excuse to tackle for sometime.

Consisting of 5 individual models, all with different damage and setups, the kits create a highly detailed and individual platoon. Coming in the now familiar Battlefront packaging, with a dramatic representation of Wittmann leading his men into battle in the Bocage, and an internal clamshell securing the multitude of parts it is hard not to break out the glue straight away and get stuck into the assembly.

The parts are cleanly cast and full of detail. The special dice set and markers included in the set are an excellent addition and will make fielding these gems just that bit extra special. I will be ordering a set of these extremely atmospheric and evocative models for my own collection in the very near future. There is a real heft to these models and combined with their sheer size they are guaranteed to make any allied player think twice before tackling such an imposing and dangerous enemy.

The models are as usual, from Battlefronts Flames of War series, mixed media and require a certain amount of preparation and dry runs before final assembly. This is the norm for these kinds of kits, but time spent in preparation is rewarded with a set of fine set of SS Tigers.

The client requested a particular scheme that he had found on the internet. To facilitate an accurate representation of the colours in the artwork provided I have specially blended a set of bespoke colours matching as accurately as possible the artwork provided.

With all the assembly, cleaning, undercoating and colour blending done it is time to apply the base yellow. With this applied they are starting to look like SS Tigers and the moulded detail on these fine Flames of War models starts to come to life.

the+generals+paintbrush+painting+service+15mm+kubelwagen+25mm+painting service+wargamer+collector+flames of war

Wittmann's Tigers assembled and base coated


The next job will be to apply the green and brown dispersed camouflage pattern. Using an especially fine needle and nozzle in the airbrush, specifically ordered for the task, my next Blog entry will cover how this was applied prior to detailing, decaling and weathering.
Click here for part 2

The Generals Paintbrush: Tigers Marsch! Part II


Saturday, 23 August 2008

Flames of War Objective Marker Vignette. "Mother...Hans will not be coming home for Christmas".

the+generals+paintbrush+painting+service+15mm+kubelwagen+25mm+painting service+wargamer+collector+flames of war SOLD
Part of the reason I like the Flames of War range in particular are the objective markers. A series of small vignettes that add a great deal of atmosphere to the game and look excellent on the table or in the display cabinet.

The German objective marker consisting of a Kubelwagen crashed at the side of the rood is typical. The dead driver, the broken telephone pole and fencing create a scene of roadside devastation that will look superb on the gaming table.

One of the bonuses of painting pieces for the blog is that I get to paint exactly what I want and this is no exception.

Once prepped and cleaned I under coated the whole model with Games work shop skull white undercoat and the airbrushed the Kubelwagen in German yellow and various sand and earth shades.


This was then left to dry before the real painting and detailing. The first thing to do was block in the road and scenery. After applying various shades of highlights I picked out the detail of the demolished telephone pole, fencing, helmet and sculpted shrubbery.


the+generals+paintbrush+painting+service+15mm+kubelwagen+25mm+painting service+wargamer+collector+flames of war
This was then set aside to dry after which I applied various filters before detailing the car itself. The dead driver is nicely sculpted and I saved him to last painting him in German field grey using the three-tone highlight technique. Followed by a little more shading to the vehicle to accentuate the detail and three coats of matt varnish to protect the finish.


A little Games Workshop flock and some Woodland Scenic’s shrubbery were then added just to improve the overall appearance of the vignette and there we have it.


the+generals+paintbrush+painting+service+15mm+kubelwagen+25mm+painting service+wargamer+collector+flames of war“Mother…Hans will not be coming home for Christmas”.
(Ebay item number
190246468939)
SOLD

This model is available on Ebay this week along with the other model in the set "Mother...Tommy Atkins will not be coming home for Chrismas" . (Ebay item number
190246478052)

the+generals+paintbrush+painting+service+15mm+kubelwagen+25mm+painting service+wargamer+collector+flames of warSOLD


"Mother...Tommy Atkins will not be coming home for Chrismas"
SOLD


Thursday, 21 August 2008

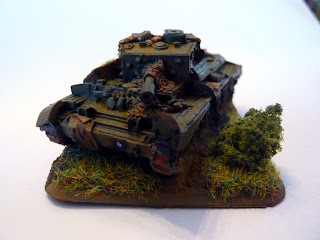
M5A1 Stuart from the 2nd Armoured Division tank Company Boxed Set from Flames of War.

the generals+paintbrush+painting+service+15mm+british+american+german+25mm+painting service+wargamer+collector+flames of war The commander of a M5A1 Stuart contemplates the fate of a British Centaur and its crew.

I have always had a particular liking for the M5A1. With its somewhat obsolete appearance and the idea that M5A1 crews pitted their 37mm cannons against the 88 armed Panthers and Tigers and won seems almost incredulous. I know they were fast and they took the German Armour from the rear but the crews must have had cahones the size of melons.

So when choosing the first models from the set to complete the choice was obvious. The Light Tank Platoon with the three M5A1 models was the first to the modelling bench.

What the models lack in size they make up for in sheer heft. The metal track set is well detailed and gives these little models a real feel of solidity when handled. The detail is easily up to what I have come to expect from battlefronts Flames of War range.

The turrets did need a little drilling with the pin vice to get the main gun to sit correctly (and firmly in the turret) and of course the resin parts did require a bit of fettling as per the norm with the flames of war range. It is always worth spending a little bit of time prepping the model prior to assembly followed by a few dry runs to test the fit and overall appearance before reaching for the glue.

Once base coated, using Games Workshops excellent spray undercoat, it is time to break out the airbrush. The models were then painted overall in Olive Drab before being dusted with various sand and earth colours, this when a good airbrush comes into its own, to begin the weathering process. Once the paint has completely dried it is on to the next stage and this is where you will either breathe life into the model or destroy all the work done thus far.

I always apply the decals at this stage, about half way through the weathering process, just prior to lining. Once the decals have been secured with Microset and completely dried I then apply various filters. Basically artist oils thinned with turps to tone down the paintwork and make the model more believable on the games table. This process has to be done extremely carefully as you do not want brush strokes or puddles of paint gathering on the model. When you have achieved the effect you want you will need to set the model aside for a day or two prior to highlighting and the final weathering with various powders and pastels.


The choice of pastels and weathering powders is important to the final appearance and should be applied slowly as too much is worse than too little in my opinion. Once you have finished with powder it is time to seal everything with a several very light and fine airbrushed coats of a quality matt varnish. Do not brush on the varnish or the powders will simply turn to mud and destroy the work. There is a real skill in this seemingly simple task but you want the atomised varnish to hit the model almost dry on the first two coats so as to preserve the weathered finish.

Worthy of special note is the commander figure. He has the finest facial detail of any figure I  have seen in the Flames of War range. He was a real delight to paint and worth the extra time that it took to bring out the detail.

The M5A1 from Battlefronts Flames of War range is a superb little model full of character and an excellent addition to anyone’s collection. Remember the Generals Paintbrush painting service is available to the gamer and collector. Email with your requirements for a quote.

Thursday, 14 August 2008

M10 3" GMC Tank Destroyer Platoon. On Ebay Item number: 190244476976.


Tiger Hunt.

I have just finished painting the Flames of War M10 GMC 3” Tank Destroyer Platoon set from Battlefront. You can check out the assembly and painting of the M10's on previous postings here on The Generals Paintbrush.

These are the first U.S. models that I have done from the Flames of War range and I have to say that I am very pleased with the results. The faces on the figures from Battlefront are improving, the first figures had facial detail more akin to Minifig and now I would rate them somewhere between Minifig and Battle Honours. Overall they are excellent miniatures and the poses and proportions are very good indeed.


U.S. 2nd Armoured Hunting German Big Cats.


Of course where Battlefront comes into their own, with the Flames of War minis, is the tanks and these models with the new plastic tracks are superbly detailed and capture the characteristics and outline of the M10 Wolverine.


Closeup of new track detail from Battlefronts Flames of War M10 Models


An excellent value set with, 2 M10’s 3” Tank Destroyers, an M20 utility AFV, a jeep with .50 cal AA MG and 15 finely detailed and painted soldiers and crew. Just what you need for hunting German big cats.

Tiger Hunt.
Contents of the latest painted Flames of war set from The Generals Paintbrush.

As always these finely painted models will be available on Ebay. I will start the auction on Sunday 17 August 2008 at 17.15 hrs. (Finish time and date 17.15 hrs 24 August 2008). Remember I offer a high quality, museum standard, painting service. For those that require something more specific drop me an email for a quote and I will get back to you within 48 hrs. Paypal is available and I ship worldwide.

Monday, 11 August 2008

Painting a Canadian Sniper Team

In this particular post I am going to look at painting camouflage, probably the most interesting and difficult aspect of painting Battlefronts Flames of War 15 mm miniatures. I have on this occasion chosen a particular favourite of mine the Denison Smock or Jacket. Made famous by the Parachute Regiment, it was also a particular favourite of the Canadian Scouts and Snipers, which is what I have chosen to replicate in this particular piece. Taken from the Flames of War the Late War British Rifle Company. I was inspired by, the famous picture of, Sergeant Harold A. Marshall of the Calgary Highlanders. This will, I hope demonstrate, that you can achieve some superb results even on such small areas.

Preparation.
Firstly as always with my 15 mm figs, after having removed any flash and the obligatory dip in detergent, I applied a light coating of Games Workshops Chaos Black. As a rule of thumb Undercoats are normally white, grey or black. However I find that in this scale that a black undercoat saves a lot of time when it comes to lining the figure.


Basic Colours
Once the Primer has dried, I like to leave the figure for 24 hrs, it is time to break out the paints an brushes and get down to work. Starting with the trousers I lay on a coat of English Khaki, paying particular attention to where the trouser meets the gaiter and the jacket to ensure that a very fine line of black is left to define the point of separation.

Once dry I apply two highlights, both highlight colours are made by mixing white to the Khaki. Obviously the first highlight will contain more English Khaki and the second more white. Remember that these colours will be added to the highest points, creases, folds and around the upper knee area.

Next, the Denison Jacket. I will be applying a three-toned camouflage pattern to this Flames of War Canadian Sniper Team. A mid green, a mahogany brown and a sand. While the pattern is almost equal parts of these colours I will be applying the sand as a base coat, because it is the lighter shade it will contrast the darker colours and therefore ease application of the camouflage pattern. Once all three colours are applied you should have a nicely camouflaged model. Again highlights can be added my mixing in white to the green and the sand colour into the brown. Add white to the brown and you will end up with a horrible pink.

Detailing the models
The equipment can now be picked out. I mix a shade for the base of field grey and olive green and highlight in the normal way i.e. adding white to the base colour. I have always preferred my models weapons to have a darker wood finish but this is purely personal choice.

Flesh Tones

I always start with |Citadel Bestial Brown as an undercoat followed by bronzed flesh and highlighted with a 50\50 bronzed flesh and skull white. In this scale this three-tone approach works extremely well.


There we have it the figures are ready for basing. The next sniper team up for painting are a pair of Waffen SS in camo smocks.

Friday, 1 August 2008

Flames of War Game Gallery. Plus Special Requests

I have had a number of enquiries, referenece, if I would also consider painting 25mm figs for clients. The first set are shown here and are from Renegade Miniatures early WWI range. So if any of you collectors want to use my painting service for your 25mm specials send me an email for a quote.


I thought you might like to see some of my latest commission work prior to shipping. Please email me for a quote if you want to add similar quality models and miniatures to your collection

Tiger Hunt.
Flames of War 2nd Armoured Division M10 Tank Destroyer Platoon Set.


the generals+paintbrush+painting+service+15mm+british+american+german+25mm+painting service+wargamer+collector+flames of warTiger Hunt II.
Flames of War 2nd Armoured Division M10 Tank Destroyer Platoon Set.


New from Flames of War. A Hidden SS Sniper Team keep British Infantry at Bay


Elements of the 7th Armoured Division reach their Objective Marker


Flames of War. 7th Armoured Division Somewhere in Normandy.


Flames of War British Infantry and AFVs

Sunday, 27 July 2008

Painting the Flames of War M10 3" GMC Tank Destroyer

Having assembled the model itself you will need to wash it to remove release agents and dust. This is best done with warm soapy water and a large bristle brush. This way you can be sure that you have removed all the release agent and build up of residue and dust.

Once that is done you will need to leave the model to air dry. Resist the temptation to dry the model off with a cloth or tissue. This will only leave dust and material on the model that you will only see once you have painted the model and will spoil all the hard work. Now that the model is dry its time to undercoat. I always use black for AFVs that are dark green or grey. German tanks with a yellow or ochre base colour I tend to undercoat in white so as not to "kill" the colour.

The Flames of War M10 3" GMC Tank Destroyer Platoon preped and ready.

Now the real fun can begin and its time to break out the airbrush and paints. I use the Vallejo Model Air range as these are pre mixed and can be used in the airbrush straight from the bottle. The range of colours is excellent and the paint gives good coverage with a smooth realistic finish.


Airbrushing the M10 Tank Destroyer.

In the case of the M10 I used Olive Drab as the base colour followed by various yellows and browns to weather the paintwork. Once this has been done and left to dry I apply a filter of burnt sienna and lamp black oil paint heavily diluted with turps just to tone everything down. At this stage I apply the decals before any other weathering.

Firstly gave the model a light spray of matt varnish this protects the work already done and reduces "silvering" of the decals backing film. Decals should be applied to a model with something like Micro Set, this assures excellent adhesion and less "silvering". For heavily detailed areas and difficult shapes I use Micro Sol, this literally melts the decal down onto the model and allows the transfer to conform to the model, check out the Allied stars on the Cromwells and you will see what I mean. Terrific stuff.


The M10 undergoing final weathering.
(The Panthers in the background will be covered in a later post)


Now its time to weather up the model this is done with a variety of MIG powders and artist pencils. Remember weathering should enhance the model and the work already done, it is not an excuse to cover a sloppy paint job.


The Flames of War M10 3" Tank Destroyer. Painted and ready for play.

You can check out further pics of this model in the July gallery by clicking the link below.

Tuesday, 22 July 2008

Flames of War July Gallery

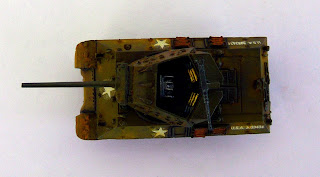
M10 3" Tank Destroyer Right Side
*click here to see how this was created
http://thegeneralspaintbrush.blogspot.com/2008/07/m10-gmc-tank-destroyer-platoon.html


M10 3" Tank Destroyer Left Side

Flames Of War M10 Top View


M10 3" Tank Destroyer rear View

M10 3" Tank Destroyer Front View


Flames of War British Late War Tank Platoon
Sold


Flames of War 7th Armoured Division Cromwell IVs
"The boys are back in Town"
Sold

Flames of War 7th Armoured Division Cromwell IVs
Rear View
Sold


Sherman Firefly VC
Right Side
Sold

Sherman Firefly VC Full On!
Sold


Flames of War Late War British Infantry


Flames of War British Late War Objective marker


Flames of War Late War British Infantry